3-Gun Tactical Lever Action: "Shorty" Complete
- Uncle Fudd
- Jul 16, 2023
- 3 min read
The lever gat is finally ready for her debut..... Well kind of.
I'm waiting for Henry to get their walnut stocks back in stock so that I can finish the adjustable & recoil buffering stock for this tactical lever action. While I'm waiting, I decided to make simpler version of the stock and see how she feels.
This simpler version is actually closer to the original design for the project, shown below. The adjustable stock with cheek weld, etc. was an add on that I decided on halfway through the build.

In addition to making the simpler stock, I wanted to make some changes to the picatinny rail. As you can see below the Henry Scope Rail is elevated above the receiver by about a quarter of an inch. The Aero Precision Ultralight Mount then raises the scope further off the bore axis. This is OK for accuracy, but I think it looks a little odd to have some many step ups.

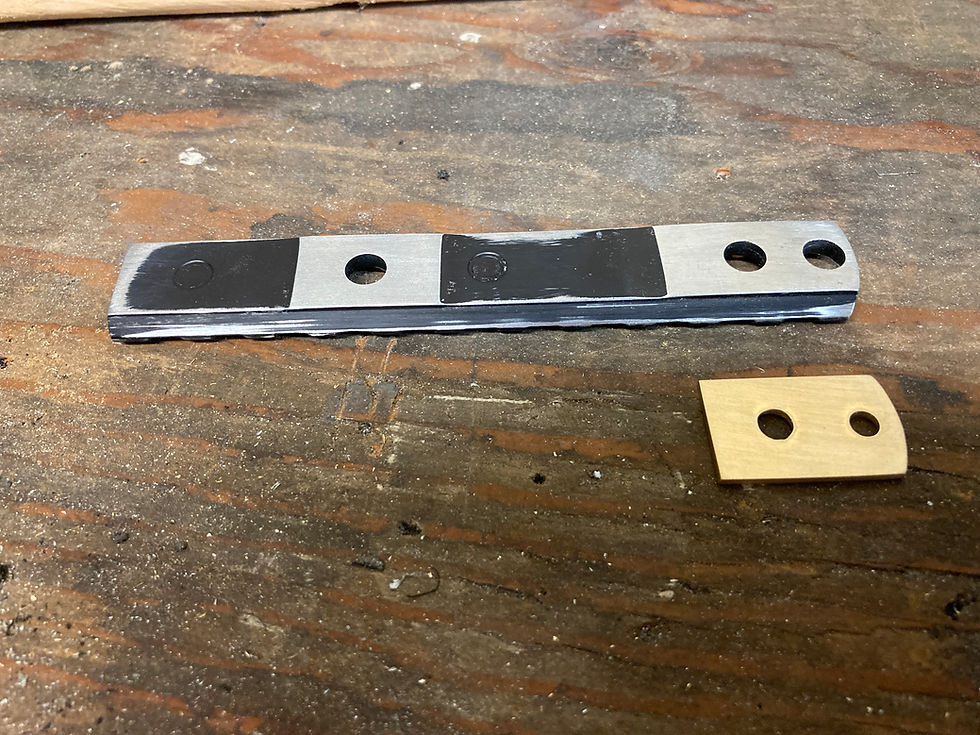
So, I decided to lower the picatinny rail and then make a small brass spacer to keep the back level with the front. I used a combination of my Dremel 4300 and sander to flatten the underside of the rail.

Then, I made the spacer for the rear with the same profile as the tail end of the rail.

I then flipped it over and began working on the top side. When I removed the "legs" off the bottom of the rail, I also ruined the countersink that the mounting bolts sat in to hold the rail to the receiver. So, I need to make a new way to attach the rail.
My solution was to use a combination of larger head-ed bolts and washers. To fit these bolts, I need to remove some rail material near each hole. Time to get hacking....

The rear holes were so close together that I decided to make a singe custom "washer" rather than trying to get two off the shelf washers to fit side-by-side. Below is the double washer I made out of some thin stainless steel I had left over from another project.

A normal washer worked just fine for the front hole, so I sanded, degreased and then painted it all with some Aluma-Hyde Matte Black. This has become my go-to paint for all my projects. It takes a long time to cure (unless you heat it), but is very durable once cured and gives a bit of texture which I really like.

The next two pictures are of the rail complete and in place. Not a huge difference from before, but I'm glad I took the time to do this extra touch, and really like the tie-in of the brass spacer on the back end of the rail.


All the shorty stock needed was some holes filled (this was the stock I'd been using as the template of the final adjustable stock), some sanding to remove the checkering on the front, and paint.
For the butt pad, I used a cut out from a rubber shop floor mat I got from Home Depot (kind of like this one). I epoxy-ed that to the rear of the stock before sanding to it'd have the same profile as the wood.


Alright, now to the full "Shorty "build pics. Keep an eye out for the final build post with the adjustable stock and all. For now, enjoy this tease.


7 Lbs 9 oz unloaded is pretty good considering the a Stock Henry X in .357 mag is 7 lbs 5 oz. What do you get for an extra 4 oz?
3 Extra rounds capacity
1-3x Scope, mount, & picatinny rail
Full length handguard
Compensator
Some cool brass accents
That's a trade I'll take!
"Shorty" Version Build List:
Base Gun: Henry Big Boy X Lever Action
Picatinny Rail: Henry Scope Mount
Scope: Leupold VX-Freedom LPVO
Scope Rings: Aero Ultralight Cantilever
Stock: Henry Natural Wood with some serious modifications
Handguard: Custom made from a 2" x 1" carbon fiber tube
Extended Magazine Shell: Custom made from titanium
Extended Magazine Inner Tube/Spring: Henry's 10-rounder
Muzzle Brake: Strike X-Comp & Thread Adapter
Accents: Custom formed brass


Comments